Splitting a large red oak log to make cutting boards.
I made a bunch of beautiful cutting and cheese boards from a very large short section of red oak from Schoolhouse Road in Shutesbury.
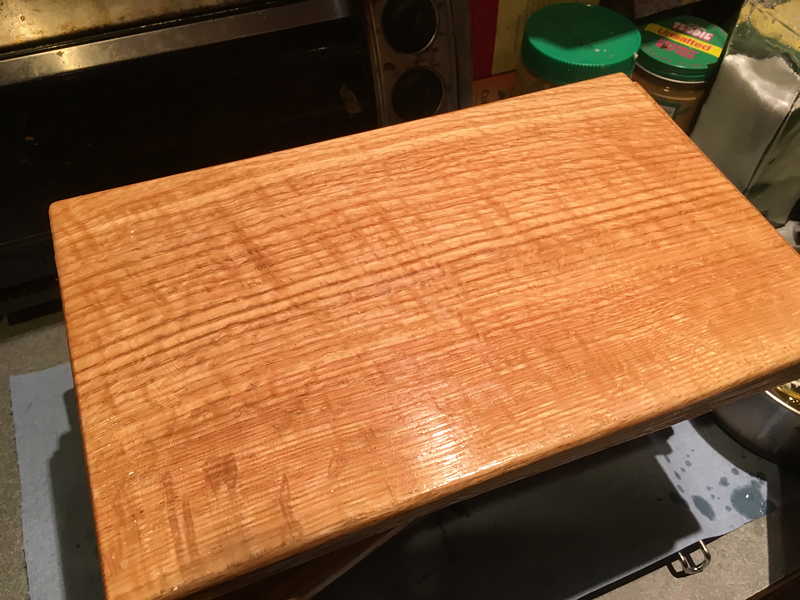
The section I split and then milled was about 26” in diameter” so I was able to use a single piece of wood for each cutting board instead of gluing a number of pieces together.
I split and milled the boards as close to radially sawn as I could get. This means the yearly grain lines are close to perpendicular to the board surfaces. This makes the boards stringer and more stable and it also makes the patterns on the surfaces much more beautiful.
It’s very hard to show how wild the patterns and curl in the wood shows up in a still image so heres a 9 second video of the surface of one of the cutting boards in the sun.
Some very large red oak logs I turned into boards
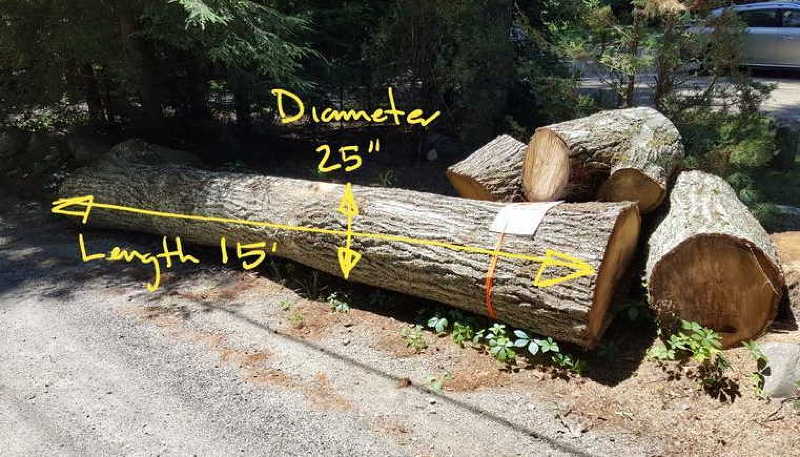
In July 2018 I reached out to Jeff Sward a homeowner on Schoolhouse Road in Shutesbury who had been trying to find someone who could use a very large red oak log from a tree he had to have cut down. The largest piece was about 25” in diameter and 15’ long. It was too big for most folks to process for firewood. ANd because there was only one long section not enough to bother with for a real logging truck to take to a sawmill.!
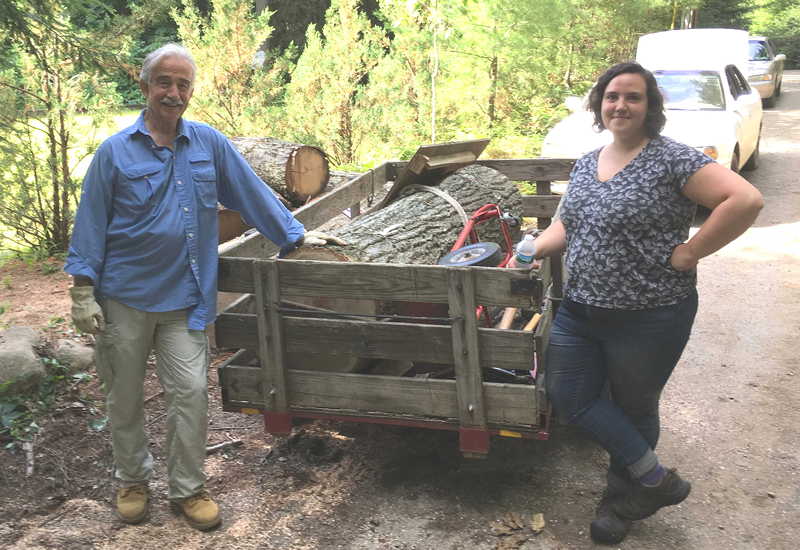
I thought if I cut it into two pieces I might just barely be able to fit one section at a time into my older 4x8’ utility trailer. It was a complex process but Rebecca and Jeff helped.
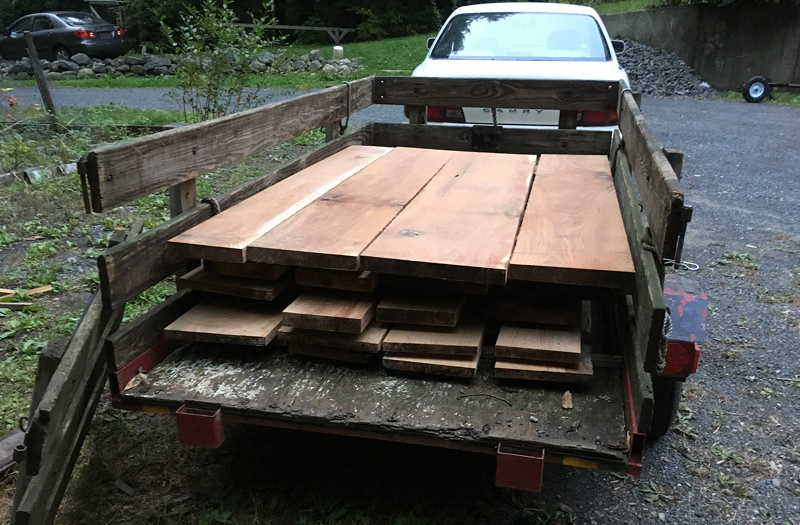
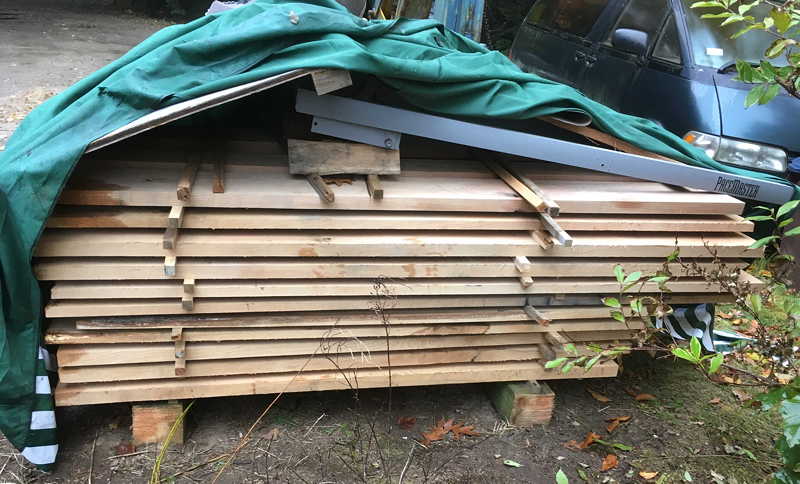
Here’s one of the shorter sections milled into boards.
The red oak boards are stickered and air-drying now.
A short section left … maybe cutting boards?
I went back and was looking at a short section cut closer to the base of the tree and was wondering if I could do something interesting with it. I was pretty tired at that point in the day but decided to split it into about 12 pie-shaped sections with steel splitting wedges and my short-handled 8 lbs sledge hammer and bring them home. Maybe I could make cutting boards??
By splitting the short section into pieces I was then able to use my large bandsaw to mill very short boards with the grain running very close to perpendicular to the face of the boards. Cutting boards this way is often called quarter sawn though I usually call it radial sawing because my goal is to have each board cut on a radial line from the outside edge of the tree directly towards the center.
Boards are both stronger and more stable when the grain lines are perpendicular to the face and the faces can also be more beautiful. I wouldn’t know how beautiful until they dried for a couple more months.
How fast would the boards dry?
I stickered the boards in my basement with a dehumidifier set at 45% RH and a fan set at low speed blowing on them. I picked a couple of boards from the top of the pile and weighed them every couple weeks so I could tell when they had dried close to equilibrium with the relatively dry air in the conditioned basement.
By October the boards the weight was hardly changing when I took new measurements so I decided to process a couple of the largest boards to see what they looked like.
Here’s one of the first ones I planed and then sanded smooth. It has a finish of just food-grade mineral oil.
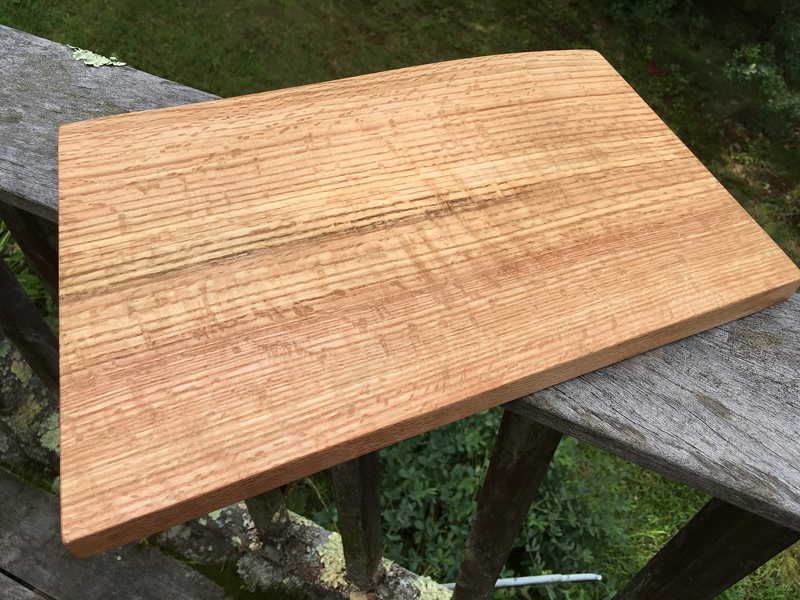
Wow!
I gave this one to Tommy Boynton who built the house on Schoolhouse Road and lived with that red oak tree for many years.
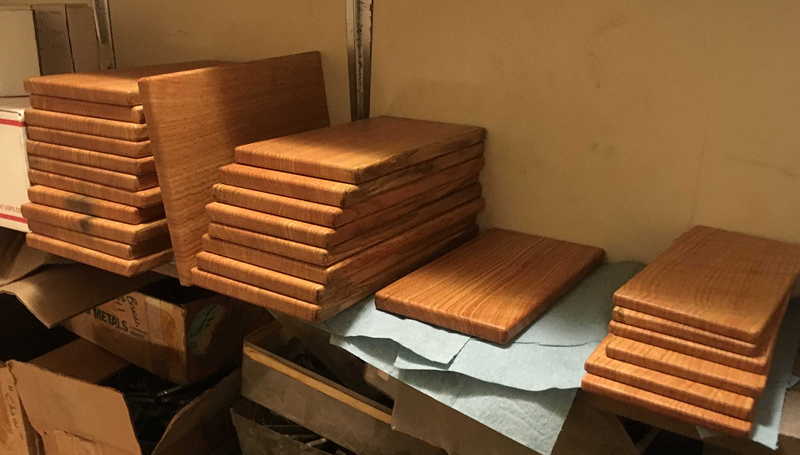
Processed all the flat boards into cutting boards.
About half of the boards I had stickered in the basement ended up warping and curving small amounts when they dried. I decided to make cutting boards out of all the ones that stayed completely falt as they dried.
I used a planner and drum sander to process the surfaces of the boards and a jointer and router with a round-over bit to process the sides and edges.
Wet the surface of each board and sanded smooth again
Before finishing I took a wet rag and moistened the surface of each cutting board and let it dry. This in effect “raised the grain”, it made the surface rougher. I sanded each board smooth again.
Finishing with food-grade mineral oil and beeswax
I like using food-grade mineral oil for cutting boards because it makes the wood look beautiful and is completely non-toxic – but it doesn’t actually dry very well.
This time I decided to try mixing beeswax into the mineral oil so the finish would dry just a bit harder. Rebecca had some beeswax pastilles she gave me and I combined a small amount of these with food-grade mineral oil I got at the drug store.
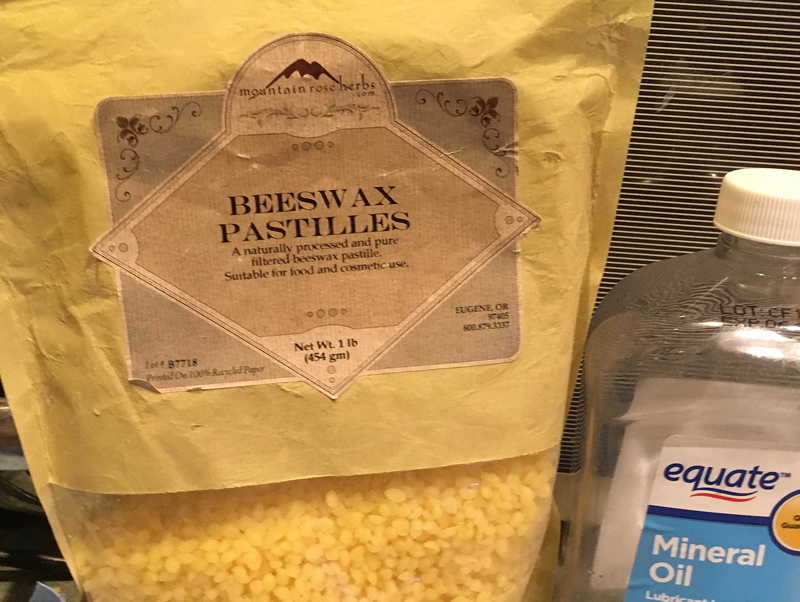
In order to get it to flow well I had to heat it up in a small pan.

I also heated each unfinished board up for 30 s in the microwave so the heated oil and beeswax would flow deeper into the pores of the wood.
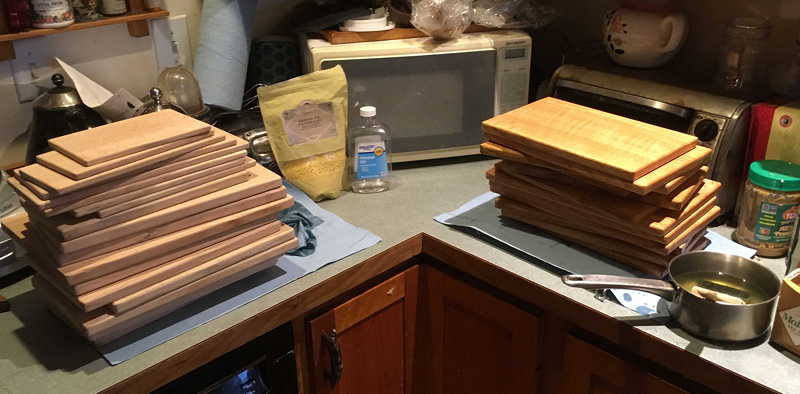
Here’s what the boards looked like before finishing.

And here’s what they looked like just after applying the oils and beeswax.
I set them aside to dry and then polished the surfaces by hand.
All done
I had many different sizes of boards and I decided that I’d call the thinner ones cheese boards because I wasn’t sure they would stand up to the kind of abuse my family puts cutting boards through.
All the different sizes of boards.
Taking care of the boards
After using a new cutting board for a while the surface will get a bit rougher. You can use fine sandpaper to smooth the surface again if you like. This normally needs to be done only once or twice.
After a longer period of hard use you might also want to smooth the surface with fine grit sandpaper and re-coat the board with food-grade mineral oil and beeswax.
Smoothing the surface with sand paper
Initially a new cutting board becomes rougher because some of the structures in the surface of the wood expand more than others. Wrap some 220 grit sandpaper around something like a foam block and sand the surfaces down for a few minutes until they are smooth again.
Restoring by sanding and refinishing with food-grade mineral oil and beeswax after hard use
After a longer period of hard use you can restore your cutting board.
- Clean the board well and let it completely dry.
- Smooth the surface with 220 grit fine sandpaper.
- Try and remove as much dust from the board as possible.
- Mix together some food-grade mineral oil and a small amount of beeswax. Heat this mixture in a small pan until the beeswax melts. Let the mixture cool enough so it is still hot but not so hot to hurt you.
- Optional: heat the board for 30 seconds in a microwave.
- Coat all surfaces of the board with the mineral oil and beeswax and rub it in well with a rag or paper towel.
- Let the mineral oil and beeswax finish dry for a day and polish with another clean rag or paper towel.
You can store the save any extra mineral oil and beeswax mixture to use again in another 3-6 months.
Custom initials
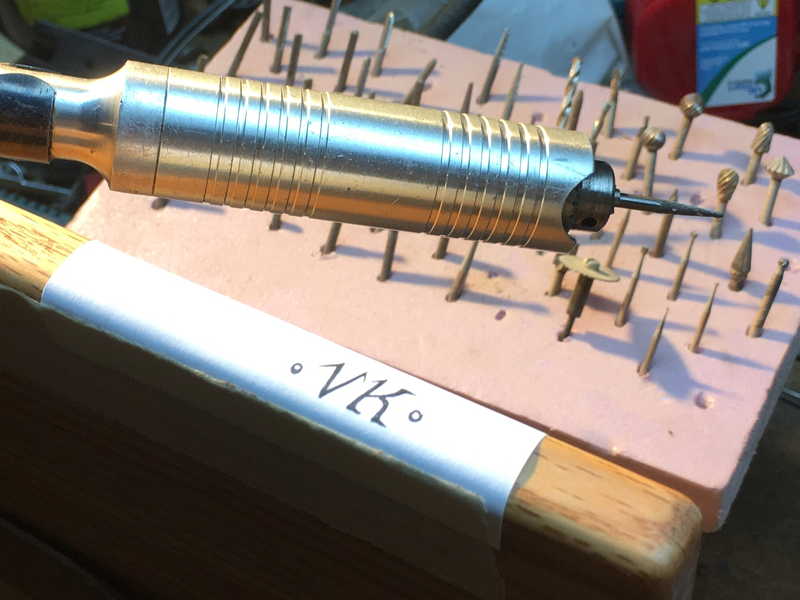
Some neighbors wanted their initials carved into the edges of two boards for each other so I had them draw out how they wanted them to look. Their initial sketches were larger than would fit on the edges so I scanned their sketch and reduced the size so it would fit on the edges of the boards.
I taped the printed sketch onto a board and used a rotary tool with several different bits to carve out the shapes of the initials.
Here’s one with a bit more spacing between the letters.
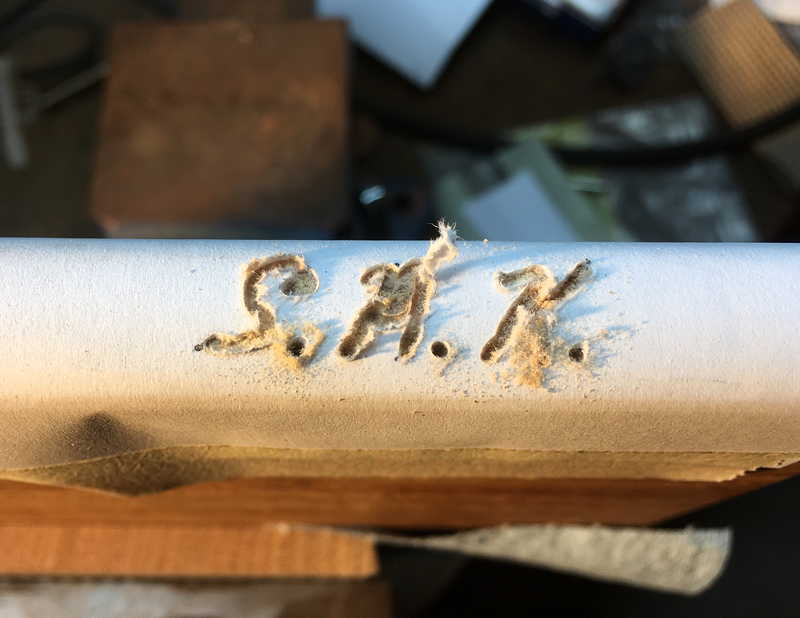
After processing with smoother files and sandpaper I used a hot soldering iron to burn the initials
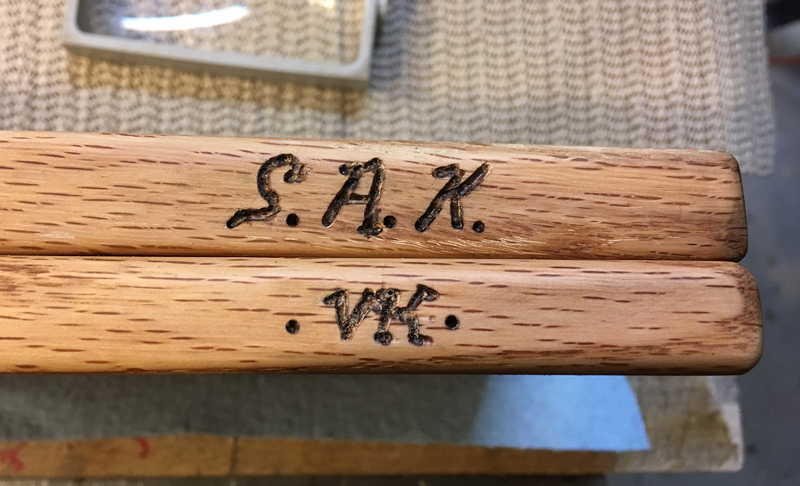
I realized that it helps to space the letters a bit further apart. Next time if they are a bit too close I’ll space the initials a bit further apart.